Perlesandco 468x60

Tuesday, September 27, 2011

Bangles

I'm feeling a bit better now, and I managed to take my time to caress my shinies (lol) and figure out what I wanted to try next.

After reading the post from "Beads For Brains:365" blog about this cute little peyote bangle I really, I mean REALLY wanted to give it a shot. I've always had some sort of weakness towards bangles - ever since I were little.
The pattern is designed by Viki - FDEkszer and can be purchased from her Etzy store for a very reasonable price. She also have a lot of other patterns, so I highly recommend to take a look.
To be honest, I've always been a tad bit against buying patterns online but... I... Wanted it! After all; Rules are meant to be broken.
The pattern itself calls for 11/0 cylinder beads, for mine I used Matsuno seed beads instead since I haven't really been stacking up on Delicas at the moment... You'll also need about 40 3mm beads - again I changed mine to 4mm since I'm all out of 3mm'ers, but it works just as nice.

Finally I also got to use some of my crystal lined hot pink seed beads for something. The color is very bright and clear so I've been a bit scared of using it to just anything, but this I love. I also decided on using up some of those czech fire polished glass beads in capri blue that I bought a while ago. I love the capri blue color since it's so radiant, and I like the crystal lined hot pink, didn't know what to combine them with. I bought about 20 grams of crystal lined copper seed beads and hey, they look really good with the capri blue beads, it almost gives it an antique Egyptian look to it.

One of the most fun part with this project is that I got to practice my peyote stitching a lot more. I also learned how to the peyote stitch in a REALLY FAST way. You can read about it at the "Wild Sally Road" blog here. You HAVE to read it.

Friday, September 23, 2011

Update - I still live!

Yeh, I haven't really been too active this nor the previous week. The reason is that I've been rather sick, and I haven't had enough strength to blog at all, nor to do much beading either. I'm still a tad bit sick, I woke up this morning with a running nose as well...
I just wanted to update and show that I'm not dead yet, and also share some minor stuff that happened this week.

I finally were able to go and pick up my new glasses, which I ordered two weeks ago at the store were I bought my previous ones.
I couldn't resist these. They were so shiny and damn smooth.
And while I were waiting for them to open again (lunch break) I went to the store where I buy some of my beads to see if they for ones had received some new ones in store, which they had. O'boy, they had. There were a lot of new stuff which I wanted BUT... I won't pay 3 euros for one single bead that wasn't really worth the money, so my purchase ended up a bit smaller then I hoped, but I had planned for that to happen anyway!

I added some pics of what I bought, and I also added a posing cat just for the fun of it lol, and because she's so damn cute.


I bought a few of these disc beads, which are just beautiful. They have a rainbow pearl effect shine on the surface.


Yum yum.

Friday, September 16, 2011

CRAW attempt

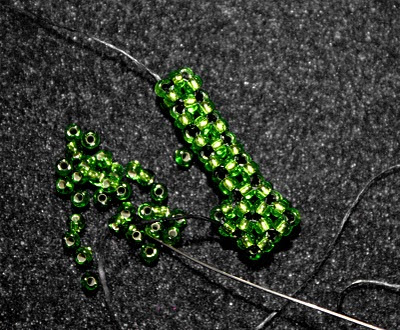
I was so happy when I saw this video on YouTube on how to make CRAW - Cubic Right Angle Weave, or 3D RAW.
I saw a diagram on this in one of the issues of Bead and Button Magazine, but I found the diagram and the description being extremely hard and complicated to understand.

This video tutorial by Heather Collin is really easy to grasp, and even if she only shows how to make one row, it's easy after that to figure out how to add more.

On my attempt I used some 9/0 seed beads; I wanted to use some bigger beads since I were learning. I also added a second row...


Wednesday, September 14, 2011

Necklace: Veins

One commission is finished and taken pics of...

At the moment I get a lot of commissions on russian spirals in different color combos etc... This time, since I always want to change the design in some way, when I haven't done the color before, and if I haven't received any directions on how the person want it to 100%. Then I tend to take the design a bit further then just a plain, simple rope chain.


This time I only used two core beads, to make the chain a bit thinner then what I normally do. I also attached a simple line of 11/0's that swirl around the piece, and then square stitched the three laps in the center so it wouldn't hang too loose. For each end I added two 6mm fire polished AB Czech glass beads. Then I added a copper chain and a brass lobster clasp.


Necklace: Iris

I really, really love working with the St. Petersburg chain stitch, and decided on making a double chain, incorporating some 4mm glass beads into the piece.

Erhm... I don't really have too much to say about this piece as I just wanted to make a double chain...
I also used 11/0 seed beads, in a color called "Multi Iris" hence the simple name :p
I also used an 8mm pearl in the same color as the 4mm'ers to work as a focal bead.

Since I do love to work with the St. Petersburg  chain stitch, I'll definitely do more pieces with it. For example I've had in mind of making a bracelet piece using two double chains, going with the same colors I used for my"The Crow and the Butterfly" choker I made a while ago, but we'll see when that happens. I'm gonna begin with the latest commissions I've received in a moment, so it might take longer to begin and finish up what I wanna do for myself :p

Sunday, September 11, 2011

Necklace: B&W Daisies

Sat up last night and decided on making a rather quick necklace for some reason... I had in mind for quite a while that I should make a simple daisy chain necklace in black and white, since I had a few 4mm black glass beads that had been laying around for quite some time.

And I just wanted to share it, since I kinda like it. Less is more as they say...

Saturday, September 10, 2011

Ring: Herfst Sakura

I sat yesterday doodling with peyote and made some cute little flower petals with the stitch, using baby pink, or sakura pink - whatever you wanna call it... Barbie pink even lol.

Anyway, I used this pink color to the free-form peyote bracelet I posted yesterday, and I kinda got in the mood of doing something with the very small amount I had of 'em. *whispers insainly* Actually I got so attached to the color so I'm gonna buy more next time...

Anyway! Again!
I managed to get a peak in the book "My Beaded Garden" by Diane Fitzgerald. Which is a really awesome and handy book if you wanna try to bead flowers using beads and THREAD, and not wire. Damn, I was so happy when I found out about this book. When I've been looking around the internet and googled for tutorials on how to make beaded flowers I only end up with getting the ones you make with wire, and yeh, made me mutter.


I tried a very simple petal, which I made five duplication on, and then I stitched 'em together in a herringbone stitch way, and then I added some 4mm glass pearls in the middle. I'd already decided on making the flower into a ring when I'd made the first petal, and so I decided on using the very same color scheme for the ring itself as I used on the bracelet I posted yesterday. And voila! A cute little ring that goes together with the bracelet, a matching little cute pair...


Friday, September 9, 2011

September Moodboard

Yay, it's up again!
The Moodboard for September at Operation Tackle That Bead Stash! 
If you wanna go directly to the post just click here.
I was really excited when I saw the color scheme I had as a choice to chose and immediately I began thinking which ones of my colors I should use, and how.

After I'd played around with the ones I chose I suddenly decided on making a free-form bracelet for the first time...  Instead of the normal single bead peyote stitch I chose to work with two drop, simply cause I wanted to work with something else that I hadn't tried before as well.


 When I decided on the free-form I tossed in some more beads in different sizes and shapes; 8/0's, 9/0's, 15/0's, bugles, pearls etc. For an attachment I used a three-loop and a magnetic clasp.


The free form was actually a really fun experience and I'll definitely do that again in the near future! And also recommend anyone who haven't tried it yet to give it a shot, cause it's really, really fun.


Monday, September 5, 2011

Beaded Bead: Angyalbogyó mintája

I were surfing around on some of the Hungarian beading blogs earlier and happened to come across a really nice one by this woman named Ewa. You can reach her blog by clicking here if you would like to take a look.
So anyway, I found one of her tutorials that shows how to make this adorable beaded bead using some 8mm and 4mm glass pearls. You also use 11/0 and 15/0 seed beads for it.

The tutorial is in Hungarian, but the diagrams (she has a couple of 'em) are really easy to understand if you're used to the basic beading techniques.
When the bead is completed, using the sizes of beads that the diagram is telling you to use the bead itself becomes about 20x30mm = 2x3cm.
I decided to add a little headpin with some matching pearls to make the whole piece into a pendant.
To go directly to the tutorial for the beaded bead, click here.


Earrings: Magma

So I sat up last night and began to doodle on a pair of earrings, using a slightly different type of sculptural peyote stitch. At first it was really just an experiment to see where it would take me, and after finishing up the first one, I decided on making a second one as well.

I used 11/0 seed beads in amber lined white, and some 15/0 seed beads in gunmetal. Then I also added a little bottom, using 4mm beads also in gunmetal.
I felt at that point that the pair were a tad bit incomplete... then I came up with this idea to add an 8mm fire polished glass pearl in the center, so it would be kinda framed.

After I finished both of them up, feeling that this is how I wanted 'em, I still were struggling with something else; ear hocks and jump-rings. The only metal I have laying around is silver, and I felt that if I would add silver, it might come out a bit too strong.
And today, I also ended up getting stuck in traffic on my first bus (where some accident on the road,. not sure what had happened yet), and I missed my second one. So I popped over to that store again to have a look around. And luckily, they had gotten some new stuff in, and they also had some ear hocks and jump-rings in gunmetal... Joink! Mine!


Saturday, September 3, 2011

Tutorial: Russian Spiral Stitch

So yeah, I've wanted to make a tutorial over the Russian Spiral stitch for a little while, since it's also one of the chain stitches I've been using the most. And I would like to share how I make it, although it prolly doesn't differ that much from how others are making it, but I thought I would share since I'm in a writing mood as well lol.

I also doodled up a diagram that shows how the pattern is worked out, if the photo's aren't clear enough. The diagram can be found at the bottom of this post.

 Mainly you use two different sizes of beads. On this photo I chose to work with two sizes of beads, but three different colors; bottom-left 11/0, center and right are 9/0 seed beads.


You begin with stringing on beads in the following order: one 9/0, two 11/0, one 9/0, two 11/0, one 9/0 and another two 11/0.
Next, you can either chose to pass your needle through the beads again to form a circle, or just by tying the tail of the thread together with the other end to form a circle; this is the way I personally prefer to do it, and I tie it with a surgeon's knot since then I can be sure that it will sit on place.

After you tied the thread, or passed it through, make sure your thread is coming out of the very first 11/0 seed bead that comes after the 9/0 seed bead.


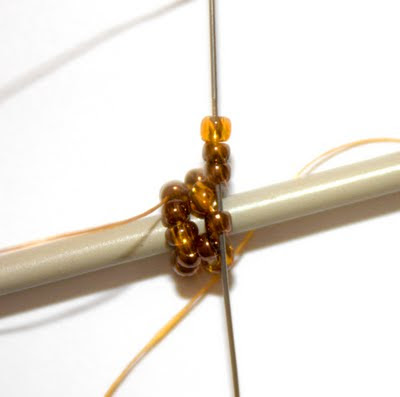
Also, to make things easier to work with, since we're working on a circular stitch, you can add your work around an object, like a pen, stick or whatever. I use my crochet needles for this, since they are so small, but yeh, a braiding needle works as well of course ;)


Now, begin with picking up one 9/0 and two 11/0's

Then pass your needle through the next 11/0 seed beads that is behind the 9/0 seed bead. So, you should skip one 11/0 and one 9/0 before you pass your needle through the 11/0.
And when you finally reach the last 3rd part of the first row go through the 11/0 that is now between the 9/0 in the base circle and the 9/0 in the first row.
Now you continue to pick up the same amount of beads in the same order we have used before, and you pass your needle through the 11/0 that is placed after the very first 9/0 in the first row.
Now you can continue to work your way like before until you get the desired length you want.

As I mentioned in the beginning of this post, here is the diagram I sketched up.

TIPS: You can use a lot of different types of designs and beads when it comes to the Russian spiral. You can for example decrease the amount of beads, depending if you want something thick, or something a lot smaller then what I just showed you. Instead of three core beads (the bigger)you can use two, and then four smaller beads.
If you want something looser you can use a lot more then only two smaller beads, and you can ever increase and decrease the amount of them over time to achieve a cooler effect.
You can also change the core beads into bugle beads to get a DNA kinda look in your piece, or just simply switch 'em out for something completely different.


Bracelet: Dalia

I've been going back and forth the whole week to the city where the school where I normally study dutch is... The schools began this week and when I came there the first day the building was closed, typical. It said that it would be open and that people would be able to inscribe on Thursday. So on Thursday I went there, had to wait in this long line for over an hour only to find out when it was my turn, that I had to go back on Friday and inscribe together with the whole class :P Annoyance.

Enough moaning tho!
While I did this back and forth going I were also working on a little bracelet, which I finished up yesterday.
To make it, I worked it on odd-count peyote stitch, and then added a little cute fringing. It's the first time I've added bugles in a peyote stitch, and since I love them (hate them cause of the sharp edges tho -_-; ) I've been looking forward to trying them in something new. Besides the bugles I also used some 9/0 and 11/0 seed beads, and then I attached a toggle-clasp as well.


Related Posts Plugin for WordPress, Blogger...