Perlesandco 468x60

Sunday, January 22, 2012

Twin for Free

I received my free 10 gram of Twin Beads from Preciosa this week, and they were just stunning and so cute! lol.
When I saw this offering they made I just thought "hey! free beads, must be worth trying to sign up for this" heh. They offer this to everyone that likes their Facebook page and uses the application to get a personal code to get 10 gram of free twin beads :)

I have always been a bit curious about these beads, ever since I heard that they were launched, but I haven't really seen any of my suppliers carry it until a week ago; Perles & Co. in France added some to their online store this week and I can't wait to order up some beads again. And the most awesome thing is, is that they sell them per 20 gram instead of 10 :)

Anyway.
The color I received of my free beads are purple iris. I thought that was great, cause I have about 100g of purple iris matte beads in my stash, so I decided to work together with those.
I didn't do anything complicated, as 10 gram isn't that much to move around. I wanted to try out peyote stitch with these, or even herringbone but I ended up making a very simple right angle weave bracelet/cuff.
For the last part of the bracelet I added a final row with the 11/0's and some 4mm purple glass beads that I pulled tightly together, to give a ruffled effect to the top and the bottom of the bracelet/cuff to give a fabric feeling to it. For the closure I used an acrylic button that fitted perfectly with the rest of the bracelet/cuff :)

At this point I had actually used up pretty much all of my twin beads, only 15 remained, lol. I felt that I didn't really want to store them away some where since it's such a small amount to be bothered with in the future, so I began on a circular peyote stitch, so see what it could evolve into. After two rows, using 10 beads I added 5 of the same 4mm purple glass pearls I used for the bracelet, and then I used latter stitch to attach the last five twins on top of the 5 twins that already where in the circle. Then I went through the top holes of the new twins and joined them together in a circle and formed an odd beaded bead, lol.
I ended up using some very thin silver-plated chain that I had laying around. Then a head-pin and two of the same 4mm glass pearls again together with this beaded bead and I made a wrapped loop :P
A delicate little necklace is what came out of the very last twins, lol.

Friday, January 20, 2012

Item of the Month: Thread Heaven

For this month's item, I decided on picking out the awesome thread conditioner "Thread Heaven".

To be honest, I've never ever worked with beeswax to conditioning my beading thread. I was first pondering about buying beeswax tho, when I first began with beading and went  to Nymo and K.O. After reading a couple of reviews on Amazon about Thread Heaven and after I even went to their official website; http://threadheaven.com to read more about the product I was amazed and knew I had to get this.

Thread Heaven, compared to beeswax is developed and created only to conditioning thread and it also gives a longer lifetime to the thread.

Happy to say, the product is actually what the description says about it on their website, and I haven't been a day disappointed. I'm even planning on buying another box soonish. It is harder for the thread to fray and it decreases the chance of getting those horrible knots when you work with your beadwork. Of course, you'll still get a knot once in a while depending on the length of your thread. I also find that if you manage to get your thread tangled and messed up, after you have applied Thread Heaven to your thread it's much easier to get it untangled again then it would have been without using the product.
I know this, cause when I first began with beadweaving and went with Nymo, I didn't have this thread conditioner, and my thread would get tangled, frayed, knotted and messed up. It made me loose my patience and almost toss the whole piece in the wall (LOL).

My main opinion is that Thread Heaven is awesome, and I recommend it to anyone. As I mentioned earlier, I've never tried beeswax or any other thread conditioner then Thread Heaven and the product is so great that I would never even think of trying out the other stuff.

I give this product a 5/5 :)

Thursday, January 19, 2012

Necklace: Seth

Okey!
I finally managed to finish up this piece that I've been pondering about how the heck I should pull it out, lol.
Anyway!
I've completed part of the pendant itself last week, but I had a dilemma; I didn't know what chain I should make that possibly could go with this one.
So after some thinking, fiddling and working with other projects I decided that I would go with a rather skinny twisted herringbone chain. I wanted to keep it simple, cause I didn't want to over shine the pendant itself in any way. I know I sometimes can have a problem that I keep adding up and adding up until it really gets way too much.
But I think I managed to keep it the way I wanted, and make it just perfect :)

As for materials and techniques...
Well, I used bead embroidery to make the pendant itself. The cabochon is handmade by myself (I posted it in one of my earlier posts some time ago).
I also used some flat backs that I honestly can't remember where I got 'em from (probably dropped off from some old clothes or something... who knows? Lol at least I got to use 'em).
The green flat back at the top I peeled loose from one of my montees that I had laying around, lol. The rest of the beads are mostly 11/0's, 15/0's and 8/0's.

I had a main idea when I made the cabochon actually... I wanted to make something ancient Egypt inspired, so I carved some patterns into the cab to make it look like some sort of scarab inspired... Thing. It quickly changed when I began evolving the bead embroidery after I bezelled it. I ended up with something that looks like and eye on each side, so... I guess it's more surrealistic and free-form then something planned, but it normally end up like a free-form piece for some reason when I work with bead embroidery. 

Ring: Crazy

So yeh, like the title says "Crazy" I decided to combine some crazy looking colors; crazy together, kinda... lol.
I actually made this cabochon with some left over polymer clay and just mushed them together into the cabochon mold I have and then peeled it out and did some final touching before baking it together with my earlier bunch of polymer clay cabs.

I was wondering what the heck I could possibly do with something that used these colors, and then it hit me. Lets make a bead embroidery ring just for fun! And yeh... So I did =P
I picked out some 11/0 dark transparent green silver lined seed beads and some 11/0 transparent pink silver lined seed beads, and some green iris 15/0 seed beads and began working.
When I finished the base, I began pondering about the ring base itself. And I ended up attaching an adjustable ring base just between the ultra suede and the stiff stuff, measuring where the ring would end up first, and drew a circle and cut the circle in the center from the with to the height, so it ended up with four open cake pieces.
 I stuffed the ring "head" through that hole and attached it with glue against the stiff stuff and then I glued the ultra suede in place, overlapping the ring base with the open cake slices to cover it up.

In the end I decided to add some diamond glaze onto the cabochon to make it shinier ^^;

Saturday, January 14, 2012

Polymer Clay Cabs 2

My Amazing Mold Putty from Castin'Craft finally arrived yesterday in the mail. I've been looking for this product for so long, and I've never been able to find it from a store in Europe; there probably is a product that is like this one, but I just can't find it :\
This week I lost my patience, and I decided to order it from the American Amazon after figuring out that I can already there pay my import tax; was darn expensive to have it delivered here tho, lol.

I made a couple of mold yesterday evening and began trying out some cane techniques using polymer clay together with the cabochon molds that I made with the amazing mold putty.
I first began on a simple cane, layering white, black, pink and silver. Then I flattened the entire thing and made an "S" shape. Then I layered a ticker layer of black around it and began playing with that base.

After I made a couple of "S" signed cabs I decided to play even more with the cane I had. So I divided it in the middle in four pieces, and then put them together in a completely different order and got something really cool and abstract.

I ended up making a little collection of cabochons in different shapes and sizes with this cane, and I think It turned out pretty darn cool ^^;

Normally I've used the varnish from FIMO themselves, but I wanted to try applying some diamond glaze on the cabs since it is a varnish and gives a domed glass effect when it's dried. And the result on the photo says enough, waaaay better then the varnish from FIMO, and the diamond glaze really brings out the glitter and the silver pigments in the clay and makes them look more like glass then clay, kinda :)

Can't wait to do this again, I just need to pop by the local craft store and pick up some more polymer clay since I'm running low on the colors I'm using the most - black and white, lawl.

Friday, January 13, 2012

Wish List: January

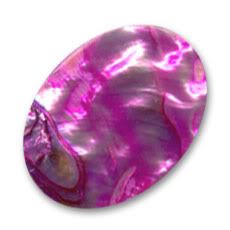
Abalone Cabochon from Perles & Co.


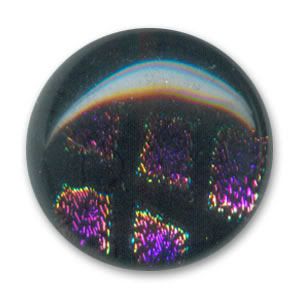
Dichroic Cabochon from Perles & Co.

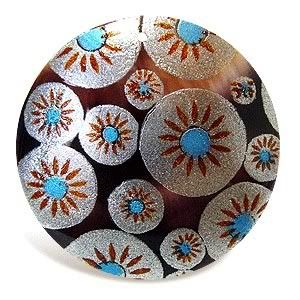
Shell Embossed Pendant from E-Beads.
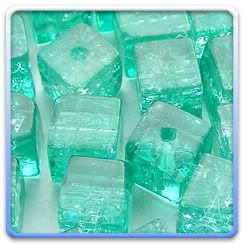
Crackle Glass Cube Beads from FAN-BEADS.
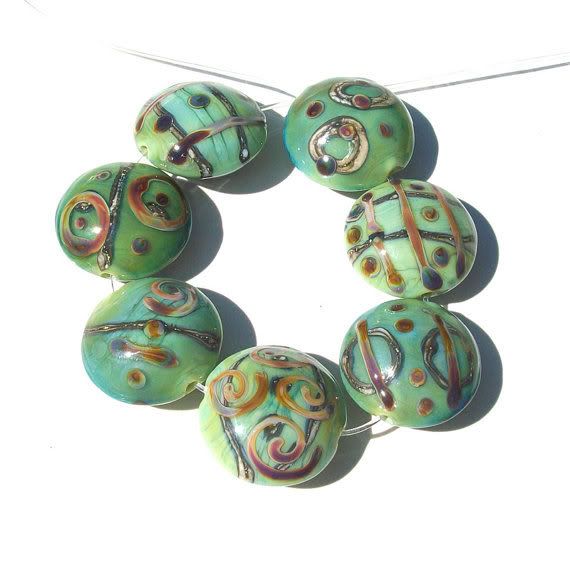
Handmade Lampwork Beads made by Genea.
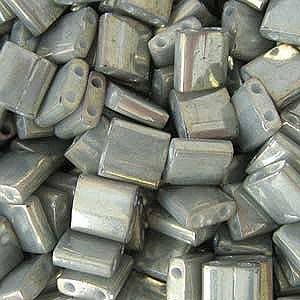
Galvanized Grey Lustre Tila Beads from GJBeads.

Thursday, January 12, 2012

Necklace: Perspective

Yesterday I pulled my act together and finished up my latest bead embroidery piece.
It ended up as a necklace, with the polymer clay cabochon I made about two weeks ago.
I was a bit worried when I finished up the part where I attached the chain to the pendant; I chose to make two separate chains and attach 'em directly to the pendant instead of making a bail, which I usually go for.
However, it ended up looking perfect, and it lays perfect onto the body when wearing it.
I decided to add a fringe to the bottom of each chain where they are attached to the pendant since it looked  a bit naked.
I attacked a toggle-clasp as closure in silver-plated silver.


This is my entry for January's moodboard on Operation Tackle That Bead Stash! :)

Earrings: UFO's

I just couldn't resist buying this lovely satellite beaded pattern by Heather Collins from her ArtFire store some days ago. I found them just looking so adorable!

While I was already working with black and white beads I decided to make a pair of these and see what else I can make of 'em. I ended up making a pair of cute earrings which actually reminds me of UFO's, kinda.
I added the beaded beads together with a black and white 8mm glass bead and a head-pin, which I made a wire wrapped loop of to finish of it off before attaching ear-hooks.

Pendant: Apollo

Last month I used the tutorial by Ewa83 gyöngyei for the beaded bead I made some time ago.
Since a while I had in mind that I wanted to create a pendant like this again, but using black and gold beads. Of course I had a thought in mind when I chose those colors; it ended up as a christmas present for my grandma, who for some reason always makes me remembering her when looking at just black and gold together.

So yeh, I ended up making one of these again since I received a request from a friend in Sweden. She asked me if I could make an exact piece of the one I made for my grandmother for a friend of hers that turns 50 on January 20th. Of course I couldn't refuse the offer so I made it as quickly as possibly and made sure to send it away as soon as I had the opportunity. I do hope her friend gets happy and satisfied when she receives it :)

Tuesday, January 3, 2012

Bracelet: Bugle Blocks

For this bracelet I used a pattern that can be found in "Beading Across America".

The pattern is designed by June Huber and mainly consists of bugle beads in two different sizes and 15/0 seed beads.

I had to change the pattern a tad bit so it would get adapted to what I had laying around.
The pattern calls for 3mm and 8mm bugle beads. I didn't have any 8mm bugles (heck I don't even know where to get my hands on 8mm'ers), so I replaced them with 6mm bugles instead.
What you also need is 8/0 seed beads that goes inside the bigger bugle units. Since I changed the size of my longer bugles I had to replace the 8/0's with 9/0's else they  would be too big to sit nicely in place.

I chose to make my piece in black and red since for me it's more personal (my favorite colors are black and red when together). I've also been thinking about making a neck piece or something using this kind of technique since I really enjoyed doing this piece. It is also a way of using bugle beads which I don't do so very often - the fear of a cut off thread will always be there ever since it happened the first time, lol.

Polymer Clay: Cabochons

Here we go again! :D

Got my act together and made a couple of new polymer clay cabochons only in black and white.
This time I wanted to try using these awesome cone making techniques which I find so cool. I made something simple for the first cabochon and just made a simple square pattern.
Then I decided to take this cone a step further and cute the cone in different ways and then pressed them together to start making cabs in different patterns.

I already decided on what to do with the bigger cab I made; For this month's moodboard over at "Operation Tackle That Bead Stash!" is the color theme black and white and as a bonus project you have to incorporate squares into your piece :)

Earrings: Simplicity

Okey, so on New Years Eve I wanted earrings to go with the rest of the red jewelry piece I wore so I quickly wrapped this cute little pair together, using circular peyote stitch for the first rows, adding a picot fringe to make 'em look like snow stars (or whatever the real english word would be for those).

I used 6/0 seed beads and 11/0 seed beads to make these.

I'll probably make ,ore of these in different colors in the future since they are so simple to make and goes rather fast :)

Monday, January 2, 2012

Earrings: Berries

I spent last night surfing around and tried to get a pattern over a beaded bead that includes peanut breads and some Myuki fringe drop beads.

Finally I found what I were looking for on DeviantArt. These little beaded cuties are called popcorn beads and are made with right angle weave.
To get to the tutorial click here.

What I did when I had created two of these lil' cuties was that I picked out two dark blue 8mm czech firepolished glass bead, two 4mm pink bicones, two gold-plated head-pins, a pair of gold-plated jump-rings and a pair of gold-plated earhooks.

Then I assembled each of the loose pieces until I had one pair of cute little earrings.
Related Posts Plugin for WordPress, Blogger...