Finally I got my guts together and tried out working with those lovely Tila beads from Myuki. I actually only had enough to make a small piece so I decided on a bracelet.
The color I had laying around was a gunmetal (who could have known, right? lol *sarcasm*) in a matte finish. I've been caressing these tila beads for a while since it's the only ones I have in my stash and aprox. 10g (50-60 beads). I got really encouraged in working with tilas, so I'll most likely build up my stash next time with some additional tila beads.
To make this rather simple bracelet I built up the tilas by using lader stitch. I did two separate ones and then I joined them together by adding a 4mm gunmetal bead inbetween. To add some contrast and also some color I added a picot fringe in an 11/0 seed bead mix.
For the closure I added a gunmetal plated chain and some jump-rings together with a silver-plated lobster clasp. At the end of the chain I added a 6mm gunmetal bead for weight measurement.
Saturday, November 19, 2011
Tilas!
Etiketter:
ladder stitch,
picot fringe,
tila
Monday, November 14, 2011
Tutorial: Fast Spiral Rope
I have been pondering since a while if I should post a tutorial about speedy spiral rope since I've used it a couple of times. I came up with the idea when I wanted to make an opera length necklace using some triangle beads. When I began making it I noticed that it would take ages to get the length I wanted if I would make it the simple way; add 3 beads, pick up 2 beads and the triangle bead and then go back through the 3 core beads and pick up another core bead etc. (see diagram below).
I'm also working with nymo and it's not as stiff as FireLine or WildFire so I had to pull A LOT on the thread to keep it snug.
I thought the thought; what if I would add all the core beads already on a string, and then work my way through them to make the spiral?
Of course I did so, since it would make sense in my logical universe. Now I decided to share my own thoughts and the idea I had :)
This is the way I made my opera length necklace, but you can use it to make bangles as well, or whatever else when you want a whole piece without adding a closure.
You begin with threading on the amount of beads you want. I recommend a bigger bead like 9/0, 8/0 or even 6/0 depending on how many times you're going through the beads.
For this tutorial I chose 8/0's for core beads and 11/0's for the spiral itself. For my Thorn necklace I used 11/0's for the core and then 15/0's together with the triangle beads for the spiral.
Depending on what size you pick, I also recommend you to change your needle to a size 12 or even a size 13.
When you have the core beads on, you simply join both thread end together by doing some knots - I normally prefer to do a surgeon's knot since it's very secure.
After you secured your thread, pass your needle through a couple of the core beads just to secure it a bit more (can never be too careful).
Now we come to the spiral itself. Pick up the beads you want for your spiral; in this case I picked up five 11/0 seed beads. Then I pass my needle through the three core beads that came behind from where my thread came out BUT I also pass through the core bead that comes in front of where my thread was coming out. So all in all you pass through four beads. (You can click on the photos to make them larger to get more details).
Now that your first part of the spiral is done you simply repeat what you did earlier.
You pass your needle through the three core beads behind from where your thread is coming out, and you also pass through the core bead that is in front if where your thread is coming out - you pass through 4 beads in total.
A spiral rope is about moving forward and making a spiral, but do remember to keep the accent beads lined up after each other so you won't end up with a complete mess.
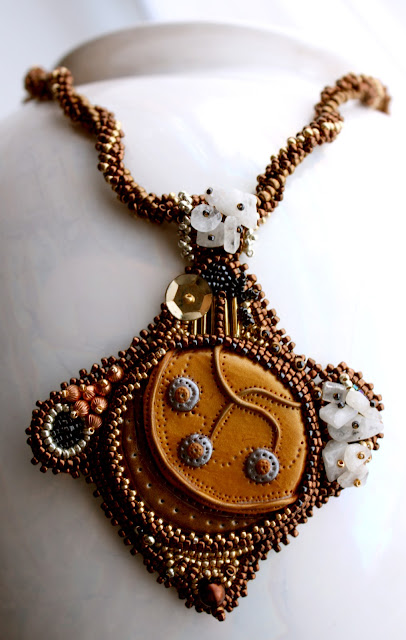
For my Mechanical Moon piece I also used the fast spiral rope technique, but I used a nylon coated wire to add my core beads on.
The nylon coated wire gives a stiffer feeling and also a stiffer look, and it's secure but you need to crimp it - it's also thick lol. I used a size 12 needle but it would probably work smoother with size 13 or 15 since I sometimes had a problem getting my needle in between the beads, sadly I don't have those needle sizes around heh.
The first thing you do with a nylon coated wire is that you measure the length you want since it's not too cheap - you don't want to use more then what is necessary.
The you pick up a crimp bead/tube and run the wire through it and then through your closure and back through the crimp bead/tube again and crimp it. (For those that doesn't know how to crimp, I'm sorry, but I'm not gonna explain that in this post).
Thread your core beads onto the nylon coated wire until you're happy. Then you just do it as you did earlier but with the opposite part of the closure and then crimp again.
Now we get to making the spiral!
You tie your thread in between the very first core bead and the crimp bead/tube. Do some square knots and some surgeon's knots to make sure the thread will sit there.
If you think it looks ugly with the crimp, just go ahead and use a crimp bead cover.
Pass your needle through the three core beads in the beginning.
Pick up five 11/0 seed beads.
I'm working with the same pattern again just to show you how I made this. The sequence can be made completely different then this, and with completely different beads as well. Only your imagination sets the limit on this. You can even do a double spiral rope by doing it this way ;)
Go back to where you came from; three beads back from where your thread is coming out and pass your needle and thread through them and pass your needle also through the core bead that comes after the core bead from where your thread is coming out.
Pull tightly.
Repeat for the next part: Pick up five 11/0's. Pass your needle through the three beads that comes before where your bead is coming out + the bead that is coming after the bead where your thread is coming out.
In total you should pass through four core beads each time.
I hope you enjoyed reading this little tutorial on how to make a fast spiral rope. From my own experiences it saves more then half the time of what it would take to make the spiral rope the traditional way.
I'm also working with nymo and it's not as stiff as FireLine or WildFire so I had to pull A LOT on the thread to keep it snug.
I thought the thought; what if I would add all the core beads already on a string, and then work my way through them to make the spiral?
Of course I did so, since it would make sense in my logical universe. Now I decided to share my own thoughts and the idea I had :)
A Spiral Piece without a Clasp
This is the way I made my opera length necklace, but you can use it to make bangles as well, or whatever else when you want a whole piece without adding a closure.
You begin with threading on the amount of beads you want. I recommend a bigger bead like 9/0, 8/0 or even 6/0 depending on how many times you're going through the beads.
For this tutorial I chose 8/0's for core beads and 11/0's for the spiral itself. For my Thorn necklace I used 11/0's for the core and then 15/0's together with the triangle beads for the spiral.
Depending on what size you pick, I also recommend you to change your needle to a size 12 or even a size 13.
When you have the core beads on, you simply join both thread end together by doing some knots - I normally prefer to do a surgeon's knot since it's very secure.
After you secured your thread, pass your needle through a couple of the core beads just to secure it a bit more (can never be too careful).
Now we come to the spiral itself. Pick up the beads you want for your spiral; in this case I picked up five 11/0 seed beads. Then I pass my needle through the three core beads that came behind from where my thread came out BUT I also pass through the core bead that comes in front of where my thread was coming out. So all in all you pass through four beads. (You can click on the photos to make them larger to get more details).
Now that your first part of the spiral is done you simply repeat what you did earlier.
You pass your needle through the three core beads behind from where your thread is coming out, and you also pass through the core bead that is in front if where your thread is coming out - you pass through 4 beads in total.
A spiral rope is about moving forward and making a spiral, but do remember to keep the accent beads lined up after each other so you won't end up with a complete mess.
Spiral Rope Using a Nylon Coated Wire
For my Mechanical Moon piece I also used the fast spiral rope technique, but I used a nylon coated wire to add my core beads on.
The nylon coated wire gives a stiffer feeling and also a stiffer look, and it's secure but you need to crimp it - it's also thick lol. I used a size 12 needle but it would probably work smoother with size 13 or 15 since I sometimes had a problem getting my needle in between the beads, sadly I don't have those needle sizes around heh.
The first thing you do with a nylon coated wire is that you measure the length you want since it's not too cheap - you don't want to use more then what is necessary.
The you pick up a crimp bead/tube and run the wire through it and then through your closure and back through the crimp bead/tube again and crimp it. (For those that doesn't know how to crimp, I'm sorry, but I'm not gonna explain that in this post).
Thread your core beads onto the nylon coated wire until you're happy. Then you just do it as you did earlier but with the opposite part of the closure and then crimp again.
Now we get to making the spiral!
You tie your thread in between the very first core bead and the crimp bead/tube. Do some square knots and some surgeon's knots to make sure the thread will sit there.
If you think it looks ugly with the crimp, just go ahead and use a crimp bead cover.
Pass your needle through the three core beads in the beginning.
Pick up five 11/0 seed beads.
I'm working with the same pattern again just to show you how I made this. The sequence can be made completely different then this, and with completely different beads as well. Only your imagination sets the limit on this. You can even do a double spiral rope by doing it this way ;)
Go back to where you came from; three beads back from where your thread is coming out and pass your needle and thread through them and pass your needle also through the core bead that comes after the core bead from where your thread is coming out.
Pull tightly.
Repeat for the next part: Pick up five 11/0's. Pass your needle through the three beads that comes before where your bead is coming out + the bead that is coming after the bead where your thread is coming out.
In total you should pass through four core beads each time.
Repeat until you're on the other side of the nylon coated wire :)
I hope you enjoyed reading this little tutorial on how to make a fast spiral rope. From my own experiences it saves more then half the time of what it would take to make the spiral rope the traditional way.
Friday, November 4, 2011
Earrings: Russian Leaves
I finally got my hands out of my pockets and gave the Russian leaves a try, since I've been enchanted by the stitch since quite a while.
To try it I always had a pair of earrings in my mind to kick it off, and then take it a step further to create a bigger piece.
The stitch is basically diagonal peyote stitch. I found the pattern however at MyLovelyBeads, the graphs are tho is Russian (I think) but it's very easy to understand how to work the stitch :)
I've been having a tube of 10g 9/0 hex beads in store for quite a while, and I didn't know what to do with 'em, cause 10g ain't really that much to work with. Of course I could just have done these with 11/0 seed beads, but you get a really shinier and light catching effect when using hex beads and I thought that woudl be more flattering for a pair of earrings like these.
Thursday, November 3, 2011
Wish List: November
Everyone is doing this so I thought I would tag along as well since it's fun heh.
A gorgeous hand painted Russian pendant/bead from Artbeads.com. |
|
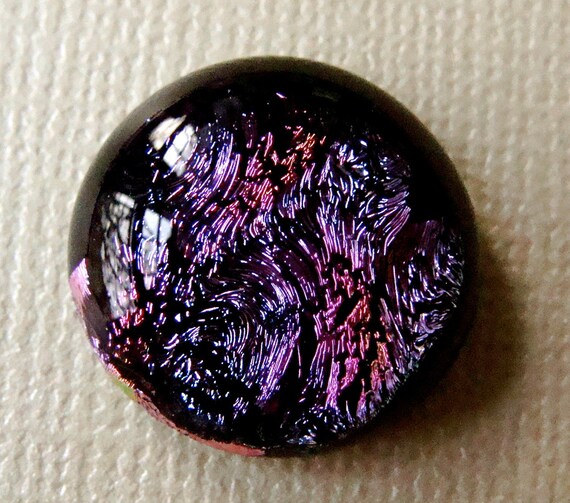
A lovely 18mm fused dichroic glass cabochons from Pink Glass Palace. |
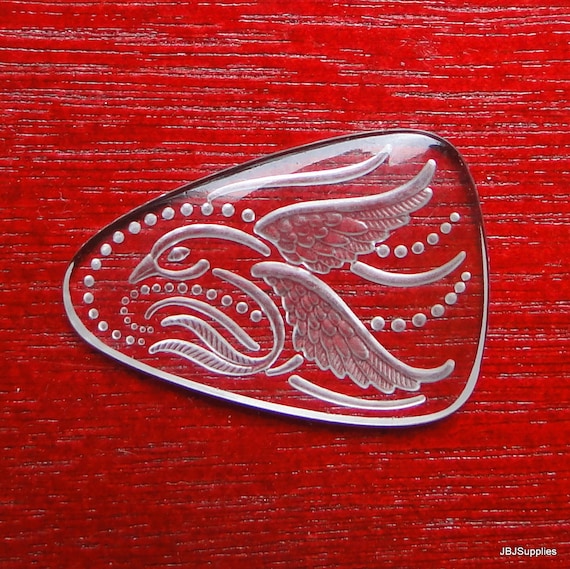
This stunning reversed glass cabochon by JBJ Supplies. |
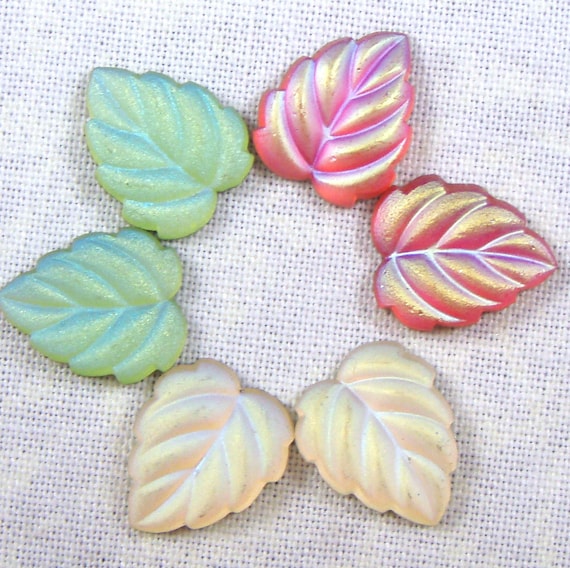
These adorable luminous leaf beads from Red Art Production. |
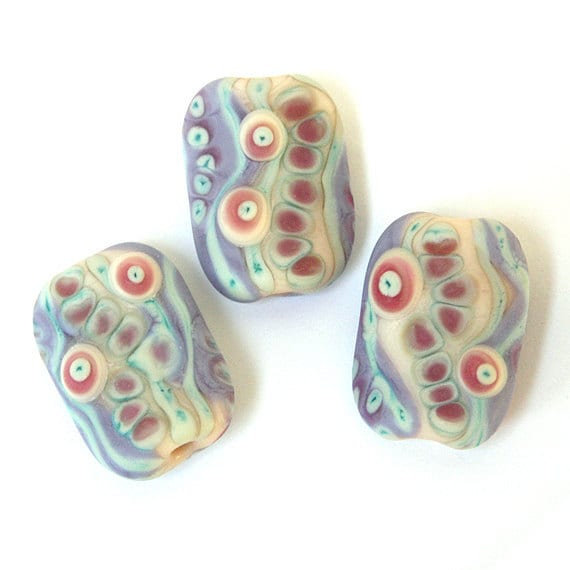
These beautiful handmade lampwork beads from Glass by Sarah. |
Hair Comb: Autumn Fall Colors 2011
This morning I began on a smaller project that I've been having in my mind for a while, ever since I saw the fall colors for this autumn; pink, turquoise and light yellow.
I decided on going a little crazy and use ALL the colors in different shades and make a hair comb using wire and crochet.
For beads I used some 11/0 seed beads in the different colors, some pearls and some Czech glass roundel beads, 28gauge black coated copper wire, 24gauge black coated wire and of course a silver-plated comb which is about 4x5cm (40x50mm - I don't know it in inches, sorry).
For this design, I first made the pieces I wanted to crochet and then I wired them around the holes in the comb in the order I wanted them. Then I began building some little "towers" or whatever we can call them lol.
What I wanted mainly with these towers is that I wanted to be able to twist the crochet ropes around them to bunch 'em up in a nice way.
Also also used some transparent crafting glue here and there, just to make sure the design will forever remain (unless you drive over it with a truck of course :D ).
Personally, I don't really use accessories to decorate my hair and I'm not sure I'm gonna use this either. It was just a fun project which gives some variation to the bead-weaving I'm normally doing. But yeh, if I get any personal requests in the future about more hair combs I won't hesitate.
Etiketter:
11/0,
comb,
crochet,
fall color,
hair,
montee pearl,
roundel,
seed bead,
wire
Wednesday, November 2, 2011
Bead Embroidery: Polymer Clay Cab. Day 2
Yarr!
Been spending this longer weekend together with my bf so I haven't really been able (or wanted) to blog anything for these couple of days :3
♥I also took the freedom of changing some colors and images on my blog just for the fun, and since the season is changing... And yeh, I were a little bored of the old one LOL.
My last post were about an almost finished project were I used bead embroidery (featuring a handmade polymer clay cabochon) - awesome technique by the way!
So yeh, I finished it now and I'm pretty happy about it.
For the chain I wanted to attach the pendant in I decided on making a spiral rope. I just did this spiral rope like I did with the opera length necklace I did in gunmetal with some triangle beads (Thorn); I first strung on the focal beads until I got the desired length I wanted for the necklace. I used a nylon coated wire were I put the 8/0 focal beads on tho, just to give it some more strength. Then I used nymo and a size 12 beading needle, making sure I would be able to get both my needle and my thread through the 8/0's.
For the "bail" I used simple peyote stitch, and then I embellished it a little with some 11/0 galvanized silver seed beads, and again those gorgeous moonstone chips.
Etiketter:
11/0,
8/0,
bronze,
cabochon,
copper,
embroidery,
gemstone chips,
gold,
moonstone,
peyote,
polymer clay,
silver,
spiral rope
Subscribe to:
Posts (Atom)