Perlesandco 468x60

Wednesday, December 17, 2014

My Reason for Being very Inactive

I thought I would come out from the shadows on this part. I've been meaning to write this post some weeks ago but I haven't really been that much in the mood.
Some of you probably have noticed that I haven't been much active on any of the social media platforms I'm usually hanging out on, of course there's a reason for everything.

A lot has happened during the the past 6 months. Both positive and negative.

Me and my now husband got married on 30th of August and then he was able to take three weeks vacation and we spent all that time with each other, just enjoying each others company.

A few weeks later I got to hear about my grandfather, which has been like a father to me during my childhood. I haven't really seen him since I moved to Belgium, and last time when we were up on vacation I wasn't able to see him. We had planned on meeting him on the Sunday before we would travel further to see my aunt (who lives 4 hours south east, if you travel by car), but he couldn't make it back to his home on time to meet us...
Since a few years back he's been kinda sick; feeling very nauseous and throwing up saliva each morning. He's been going to the doctors for a while trying to find a reason for his symptoms, but nothing until that month after our wedding.
I called my aunt and she said that the doctors had called back about the x-rays (which they did on his head), which they took some weeks before I called her this time.
He has a tumor...
They didn't know at this point if it's a bad one or a good one... He also got an appointment with a specialist in UmeƄ for a consultation, which he had to wait for for almost two months.
Then my whole family had to play the waiting game.

Two weeks ago I called my aunt since I knew it was about that time she would have followed him to the specialist since I had spoken to her some days earlier as well.
We still don't know if it's a good one or a bad one.
The specialist said he had three options to choose from; he could just go on like normal without doing anything, but keep going to checkups and take medication against his nausea, but the tumor -might- grow.
The second option was to have an operation to put in a "wire" that leads from his head into his stomach, since he has water in his head as well.
The final option is to remove it, which the specialist himself recommended, and also is the option he choose. The operation is risky, and the specialist said he was gonna try to get it done in January or February, but it could delay till March.
So we're all doing the waiting game. Again.

Since it's almost the end of the year I wanted to share a bit of myself with you, my readers, and keep you somewhat updated to what has been going on.
If I don't blog against before 2015, which I'm pretty sure I won't. I wish you all a wonderful Christmas and hope you all get a moment together with all those you cherish and love. Never take them for granted.
I also wish you a wonderful beginning of the new year, 2015.

Thursday, July 31, 2014

Update and the rest of my BOTB14 pics

So yeah, to my disappointment I didn't make it further to the next round of Battle of the Beadsmith. It was the very first time I participated in it and I wasn't really expecting my piece to go further.
Of course I feel disappointed, everyone does when you literally work your ass off and feel really proud and happy about your accomplishments and then just having it "not being good enough". You know what I mean.
It happened weeks ago, and the moment I found out that I didn't go through, I'm not gonna deny it, I felt really, really sad and even ended up shedding some tears. I haven't posted an update showing the rest of the photos I had taken due to a couple of reasons. This is one. I felt that I needed some time to think and reflect, pick myself up and just move one. The world doesn't end cause of one bump on the road, it just takes a moment to pick up the pieces.

The other reason to why I haven't posted anything is cause we're planning a wedding in a month (30th of August at 13.00 to be precise).
Exciting, but very stressful. I have to admit that I also felt a bit sad over that situation (not the wedding itself, don't get me wrong! lol), I was expecting to have my side completely empty. That turned around tho as my aunt and uncle called me on skype about two weeks ago and let me know that my uncle is sending both my aunt and my mom down in time for the wedding. So yes, I feel a lot more happier and a lot more excited.
For those that are following me on FB, Twitter and Instagram, you would probably have noticed the wip photos I've been posting of the necklace I'm gonna wear. If you're not already following me on any of those sites, just look up "AIF Design"; either with a space or not.

I've also began to upload a couple of Youtube videos on my channel after getting such a great response on the "make your own glass cabochons" tutorial that I just decided to make after I got a few requests on how to make them from people that have been seeing me post my own on the various social media sites I'm hanging around.
I've recently finished a bangle patterns that I'm gonna film as soon as I get my wedding necklace done. Then I have a couple of other video tutorials planned. If any of you, my precious readers, have any suggestions and ideas on tutorials that you would wish me to make, you leave a comment in the comment section and I'll see what I can do :)

Thursday, June 26, 2014

Battle of the Beadsmith 2014

As all of the BOTB entries have been posted in their facebook group, sorted battle-wise in folders I can now share my entry with you. I'm also gonna share a little bit of the process I went though to create these.

It took some thinking before I decided on making a pair of finger-less gloves. At first I was pondering about making a huge statement necklace, but that was going "maybe, maybe not", since I expected most of the entries to be necklace. Nothing wrong with that before you think anything, heh. A huge amount of stunning piece were sent in and I just feel in awe and honorable to be able to be a part of the contestants.
The reason to why I decided on making a pair of gloves is that I wanted to try something different. Also, my own personal favorite accessory to wear are gloves.
I first started on making the pattern I would use. I know how the essentials of constructing a glove works, and I've been sewing a couple of them years ago before I began beading.

Anyway. The graphic idea of the piece got into my head as I was listening to the book "World of Warcraft: Stormrage". And I decided to use the essence itself of the story to make a graphic impact.
I decided on using black matte beads for the base color, and then pair it up with different shades of green. My purpose in using the black matte was to get the green beads to "pop", and I'm very happy in how the result turned out.

One thing that kept bugging me in the beginning was how to make the gloves close and be able to fit on most types of hands. After some time of pondering over that question the idea of making a corset binding on the opposite side of the thumb came to mind, and that is how I ended up making the "closure". And yep, it really works. So I'm really happy with that.
 Before I even began the piece I used some of my contacts to trying to find a model for the photos. And hear, hear, I was really excited and happy when I got the call back from my mother in law that she had found one.
During the very last week of the deadline she was free and I was able to take some awesome photos of her wearing them. And I'm so happy and grateful that she was willing to pose for me wearing my beady gloves. Without her, I really don't think I would have been able to display them as well as they are displayed in the photos ♥

Friday, June 20, 2014

"Child of Night" up on Ebay

I decided to take a leap of faith and put up the necklace "Child of Night" on Ebay yesterday.
If anyone is interested just follow this link -> http://www.benl.ebay.be/itm/231263013567?ssPageName=STRK:MESELX:IT&_trksid=p3984.m1558.l2649 :)

Thursday, June 12, 2014

Two Necklaces and my BOTB 14 is done!

After I completed my Battle of the Beadsmith piece I decided that I wanted to take a little breather from anything bead related, but only for a short moment, really.
I managed to get my hands on a wonderful model who was willing to pose wearing my piece, so I'm really, really happy with the end result and with the photos of course. I sent the mail to Steven (the person who is taking care of the "battle" arrangements etc.) and everything is in order. Now all of us just have to wait till we are allowed to show the photos, which happens after they're up on the FB group of BOTB. I'm really excited and curious what everyone else have created and I'm so looking forward to see all the pieces!

Enough of that! :)

I managed to complete two necklaces after I finished my battle piece and I wanted to share them with you...

A couple of weeks ago, in April, I decided to take a little short break from my battle piece and play around with some polymer clay and I ended up making a violet. Violets are one of my favorite flower. I think it has to do with the facts that my grandmother had a very small spot in her garden were she had planted some seeds a long time ago, and each summer they would pop up and bloom with a wonderful, vibrant violet color with yellow accents. I remember that I never picked them, but instead I used to lay down on the grass right next to them, smell them and just look at them.

I ended up linking the violet I made in clay so much I decided to make a rather simple necklace of it. I didn't want to take away too much focus from the flower so I used a lot of black matte seed beads with some iridescent green Swarovski crystals.

The second necklace I began to make after one day from when I completed my battle piece. The plan was to make this necklace for my mother on Mother's Day. Of course it was one week later (last Sunday of May in Sweden) than the day when I managed to complete it and send it with the post. But at least she got something, heh... Well, everyone in my family knew I was gonna be a bit absent and work on my battle piece as I told them so...
The necklace I made for my mom is a very huge difference from what I normally do. I rarely work with suck opaque colors when it comes to beads, but as the focal piece is that tiger/cat cab (which I also made with polymer clay), the colors looked so good together with the tiger.
Speaking of the tiger... or cat... Yes, I made it as well with polymer clay. I wanted to make something a bit more personal for my mother and I had asked her a couple of weeks ahead what animal she likes and her answer was tiger or lion. So I decided to try my hands more at sculpting and made the focal myself. I'm not sure how others see it, but to me, the "tiger" looks like a hybrid between a tiger and a cat. Maybe the eyes? *shrug* Always something to work on in the future, none the less :)

I'm also gonna mention that the beaded chain on both piece are inspired by Nancy Dale's "Wrap-bracelet"  technique, which appears in one of the early numbers of "Digital Beading Magazine Australia".

Friday, April 25, 2014

BOTB 2014 "Sneaky Peak"

So yeah, I'm participating for this years "Battle of the Beadsmith" and I've been very, very busy working away on my piece and I haven't really done much else so that's the clear reason to why I haven't been updating :)
Decided to share this little "sneaky peak" photo that I shared on instagram and FB about a week ago. Yes, the photo is blurred out on purpose and then I've been playing with the color filter etc. just to tease since a lot of battlers do these "tease" photos every year since the beginning of the competition, heh.

About a week too late, but I'm wishing everyone a Happy Easter in this post :)

Tuesday, March 18, 2014

Polymer Clay, Bangle Obsession and BOTB 2014

I thought I would make a little quick update on what I've recently been up to... :)

So yeah, I caught the polymer clay bug really big time these last two weeks, and I've been a bit obsessed with making a couple of bangles which I'm sharing in this post.
I've been wanting to create polymer clay bangles for quite some time, but the thing that has always kept me at bay from it was that I didn't have any bangle bases to work with - they cost about 3-5 euros depending on where I buy them from and what sizes I want.
So what made me finally create bangles?
Simple.
I'm a member of a couple of different beading and polymer clay groups on FB and one of the polymer clay groups, which mostly focuses on sharing tutorials (free or those that costs moneh), a lovely lady shared her way on how to make bangle bases from scraps of clay. Yes, I decided to take pretty much all the scrap clay I had put a side and ended up creating a couple of different ones in rather unregular sizes - I only eyed them, I didn't measure them to 100% accurate, which wasn't needed anyway as the shapes ended up looking great.

Due to my recent, greater journey into polymer clay I've been thinking about creating another blog which only would put focus on my polymer clay creations. I'm just wondering if I should make the blog now, or wait till after this years vacation to Sweden, we'll see.
This year I'm also very happy to announce that I'm participating in "Battle of the Beadsmith 2014", and there about two weeks left until I finally can begin my battle piece.
Gosh, I'm actually starting to get nervous as I really hope I can keep up with the time (have two months, but you never know!).
I finally have somewhat of an idea what I want to create and I really hope I can stick with the plan and that it will turn out as I want it to *crosses fingers*.

Thursday, March 13, 2014

Bead Embroidery Fractal Necklace II

So, yeap! I made another necklace using two of the fractal cabochons I created a couple of weeks ago. I decided to use two, since well, they are the same fractal I just decided to render them with different color scheme when I created them in Apophysis.
The fractals are placed against a black background so I decided to stick to black pretty much throughout when it came to my bead choices. I just decided to use some similar colored beads here and there + the fringe to give it a little extra something.

When it came to the fringe, I didn't want something too basic, so I decided to make a few strips in peyote, herringbone, spiral stitch and raw. It was fun doing the fringe like that as I could just play around with each one of the shapes in the fringe one at a time until I got something I ended up liking.


Friday, February 21, 2014

Necklace using my own fractal cabochons

So I ended up with this idea in my head that I wanted to make some really personal and unique pieces creating cabochons with some of the fractal artwork I've been making over the past few years.

This is the first piece I made, and I feel really encouraged to make more.

I'm including the piece I made a cabochon from. Saying that, I didn't use the whole image, but just a portion of it as I worked the resolution of ti really high and getting a lot of the details from it made the cabochon look a lot better. Sorry for the water stamp in the middle of the image, but I'm really paranoid as I've seen a lot of people making their own cabochons using other people's artwork and then make money from them! So yes, I would like to avoid that... A lot of work went into making the fractals, there are not just pieces that I tossed together but a lot of hours and ma thematic calculations went into making them.

So on to the necklace design...

I wanted to keep it fairly simple so I just used bead embroidery for the pendant itself, and then I added a St. Petersburg chain, which is one of my very favorite chains to make. And my stubborn arse wanted to make it very sleek so I used 15/0 seed beads for it, which, gah, made it took a lot longer to make.
 

Saturday, February 15, 2014

Necklace: Novae

I just managed to finish up my latest necklace that I've been working on. For those that are following me on instagram, I've been posting some progress photos ones in a while as I've been progressing on this one.

When I created this piece I had both a plan and not a plan. As far as I had planned the design was where I wanted the dichroic glass cabochon to be and also where the five spangled glass cabs should go. I measured them out and glued them, bezel them and then I pretty much worked everything else free-form. I stopped when I had a shape I was happy with, which took a while as I kept on changing my ideas and trying out new ones.

Tuesday, February 11, 2014

My very first video tutorial

So I had a few requests on my instagram, after posting some photos of my own glass eye cabochons and people wondering if I could make a tutorial for them.

Well, after pondering some time, I decided to make the tutorial into a video one since I thought it would be a lot simpler then doing a step by step photo tutorial. Also we bought a HD cam almost two years ago when we went to our vacation to Sweden, so might as well use the darn thing instead of letting it stand still and collect dust.

I noticed that I mumble A LOT, lol. Something I need to work on it seems, heh :P
Might do more vid tutorials in the future since this one got me a bit hooked up, lol.
Enjoy! :)

Tuesday, January 28, 2014

Necklace: Child of Night

As most of you probably know by now, I'm a sucker for everything fantasy related. This time I also chose my source of inspiration to come from the world of film.
A couple of my favorite movies are the "Underworld" movies (at least the three first ones). A few weeks ago I bought a druzy agate cabochon with a titanium coating from Fabby Dabby Stones on Etsy, and John has a lot of unique designer cabochons in his shop so I definitely recommend those that are interested in that to have a look ;)

Anyway, this stone I bought just screamed "Underworld" at me when I got it in my hands so of course I had to do something related to that.
Main idea for what I had in mind was to put some focus on blood, as the blood is very important on both the vampire and the werewolf side. I used a mother of pearl disc bead to give some hint to the werewolf aspect as well, as blood is most related to vampires in most sagas.

I wanted the piece to be wearable with just a simple t-shit and jeans so I made the chain longer, approx. 60cm (23.6").
It's been a while since I've worked with gunmetal colored beads, but I really enjoyed going back to that as I'm personally a sucker for metallic colored beads in general, heh.
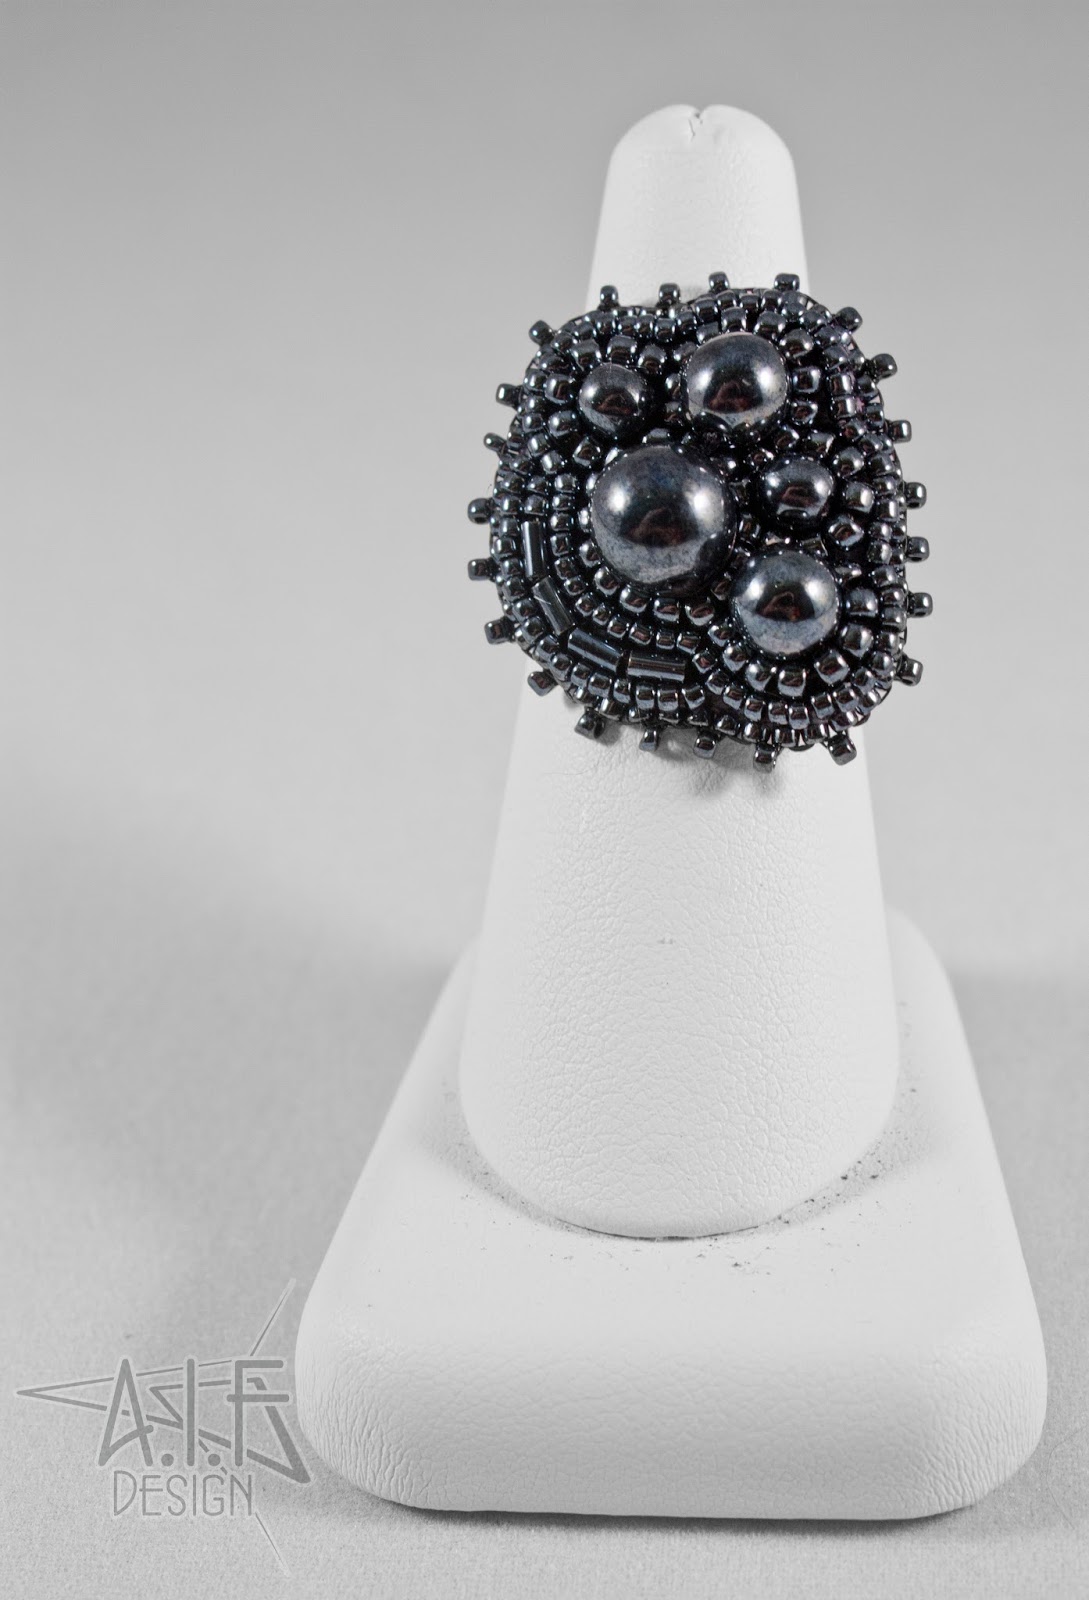
I actually enjoyed working with this piece so much that I ended up creating a matching ring that goes with the theme, mainly using those 8,6,4mm round Czech glass beads in gunmetal. It really created a cool texture scalloping them like that :)


Monday, January 27, 2014

Necklace: Grendel & Free-form Process

The inspiration for this necklace comes from the story and also from the 3D animated movie Beowulf. A lot of it is focused around the monster aspect of the story, therefore I choose to call it "Grendel".

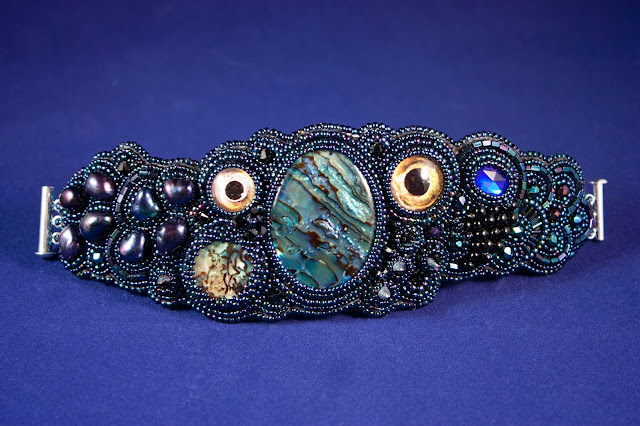
I want to share my process with you, my lovely readers, my experiences when it comes to working with and creating a free-form bead embroidered necklace. I'm gonna also explain how I worked the free-form bead embroidered bracelet I posted some weeks ago and how I took what I learned from that and made it work for a necklace.

The first thing I did when it came to the bracelet is that I decided to use one of the cuff templates I have for when I put a metal cuff blank in-between the beading foundation and the backing. I wanted it pretty tight and neat for where I was going to add the clasp, so I added about 2.5cm (1 inch) extra of the fact that the metal cuff is a bit smaller.
I then used that template and drew it onto the foundation. Why did I do this for a free-form piece? Simple, I wanted to see how far I could work to have it somehow end up perfectly on the wrist. That is the only guideline I had, the rest is 100% free-form. I chose a focal I liked then some smaller cabochons which I liked with where the design was going.

So for the necklace!
I principal is pretty much the same. The only difference is that I cut out a 14cm in diamater circle and drew that out on my beading foundation. What's it circle for? The circle determines where the neck is gonna be on the necklace. What I did was also to measure out the center of it, so I would have some sort of idea where to go.
I placed the focals I had chosen on places where I personally thought it would look neat and glued ONE piece down, and then I began to bead. When it comes to free-form and placing focal pieces such as cabochons, I always choose to glue them down one by one, and with that i mean that after I glue down one I let it dry and then I bezel it with beads (ex. peyote). After that I move on to the next focal. See, when I was working free-form I hadn't decided where anything would be at all and therefore I chose to place my materials down slowly.
You can probably see on my "Grendel" necklace that there are two separate pieces and not one solid. After I had finished the left side of necklace I began to look at the piece and experiment with the focal pieces I had on what I wanted to do for the right side, and I ended up making them separates. Just an impulse decision!

Saturday, January 4, 2014

Some New Polymer Clay Cabochons!

Earlier today I ended up taking a little break from the necklace I'm working on, and I ended up playing with polymer clay.

For these ones I had a pretty basic idea that I started out with; I just wanted to make a sort of marbleized effect on some basic oval and round shapes. So what i did first was use some scrap clay and first put those in molds. Then I took the colors I wanted to work with and mixed them up and then ran them through the pasta-machine a couple of times till I had a nice surface I wanted to cut out.
Then I ran the clay again without folding it through setting 7 and got it really thin. Then I covered the scrap clay cabs with that thin layer of color mix I just made. I basically got this idea from a video of "Beads, Baubles and Jewels" - I can't remember which episode it was, but pretty much all of the episodes of the latest series of that show is purchasable from http://www.interweavestore.com/ from about 2,25$, less even during special sales event.

So what then?
The cabs really just looked plain at this point, and I ended up being in the mood to do something different with them. I took some of the new clay tools I recently purchased and ended up playing with different types of textures. And in the end... I ended up embellishing most of them with some 2.2mm Swarovski chatons - who can resist a little sparkle? lol...
And yes, working and trying to place those small 2.2mm chatons was really just annoying sometimes, lol.

I would also like to add in this blog post that I read every comment I get, and I appreciate them very much. Sometimes I'm in that mood where I'm not always in the mood to make a reply. 
I also read every single one of the blogposts that are made from blogs that I'm following, and I really enjoy reading them and seeing what the bloggers have been making. Again there, I've been very down and it's one of those periods where I haven't been in the mood to make a comment at those either. 
 

Friday, January 3, 2014

Video Slideshow and Free-form Bracelet

First off, I would like to wish everyone a happy 2014! :D

Second, I put together another video slideshow of the pieces I made following the period from this summer to the end of 2013.


I've also been in the mood for quite some time to create a free-form bracelet with bead embroidery, I've just been lazy. Meaning I have figure out the basic size so it would actually fit around a wrist.

Since it's a new year and due to the facts that I had completed all the creations I wanted done I ended up taking one of my templates I have for creating bracelets that goes over a metal cuff. What I basically did was putting the template around my own wrist and eyeball how many extra centimeters I would be needing to add so it would look good and fit perfect together with a slide clasp.

I mainly measured out the center of the template and choose a focal I wanted to work with, in this case an Abalone cabochon. Then I fiddled through the glass eye cabochons I'd made myself some weeks ago. Yeah, I decided that to me, it's more affordable to buy clear glass cabs and then create my own eyes in PS since I have the skills for doing that + I have a really freaking awesome photo-printer, lol.
For the pictures, I also got to use my brand new photo-tent that my sweet bf bought me last month. I don't have a table really where I can put it in my little studio, so I put it together for the moment at one of the living room tables, where it won't stay, obviously :p
Related Posts Plugin for WordPress, Blogger...